
How to Mount a Red Dot on a Shotgun: Step-by-Step Guide

Published on: September 28, 2026
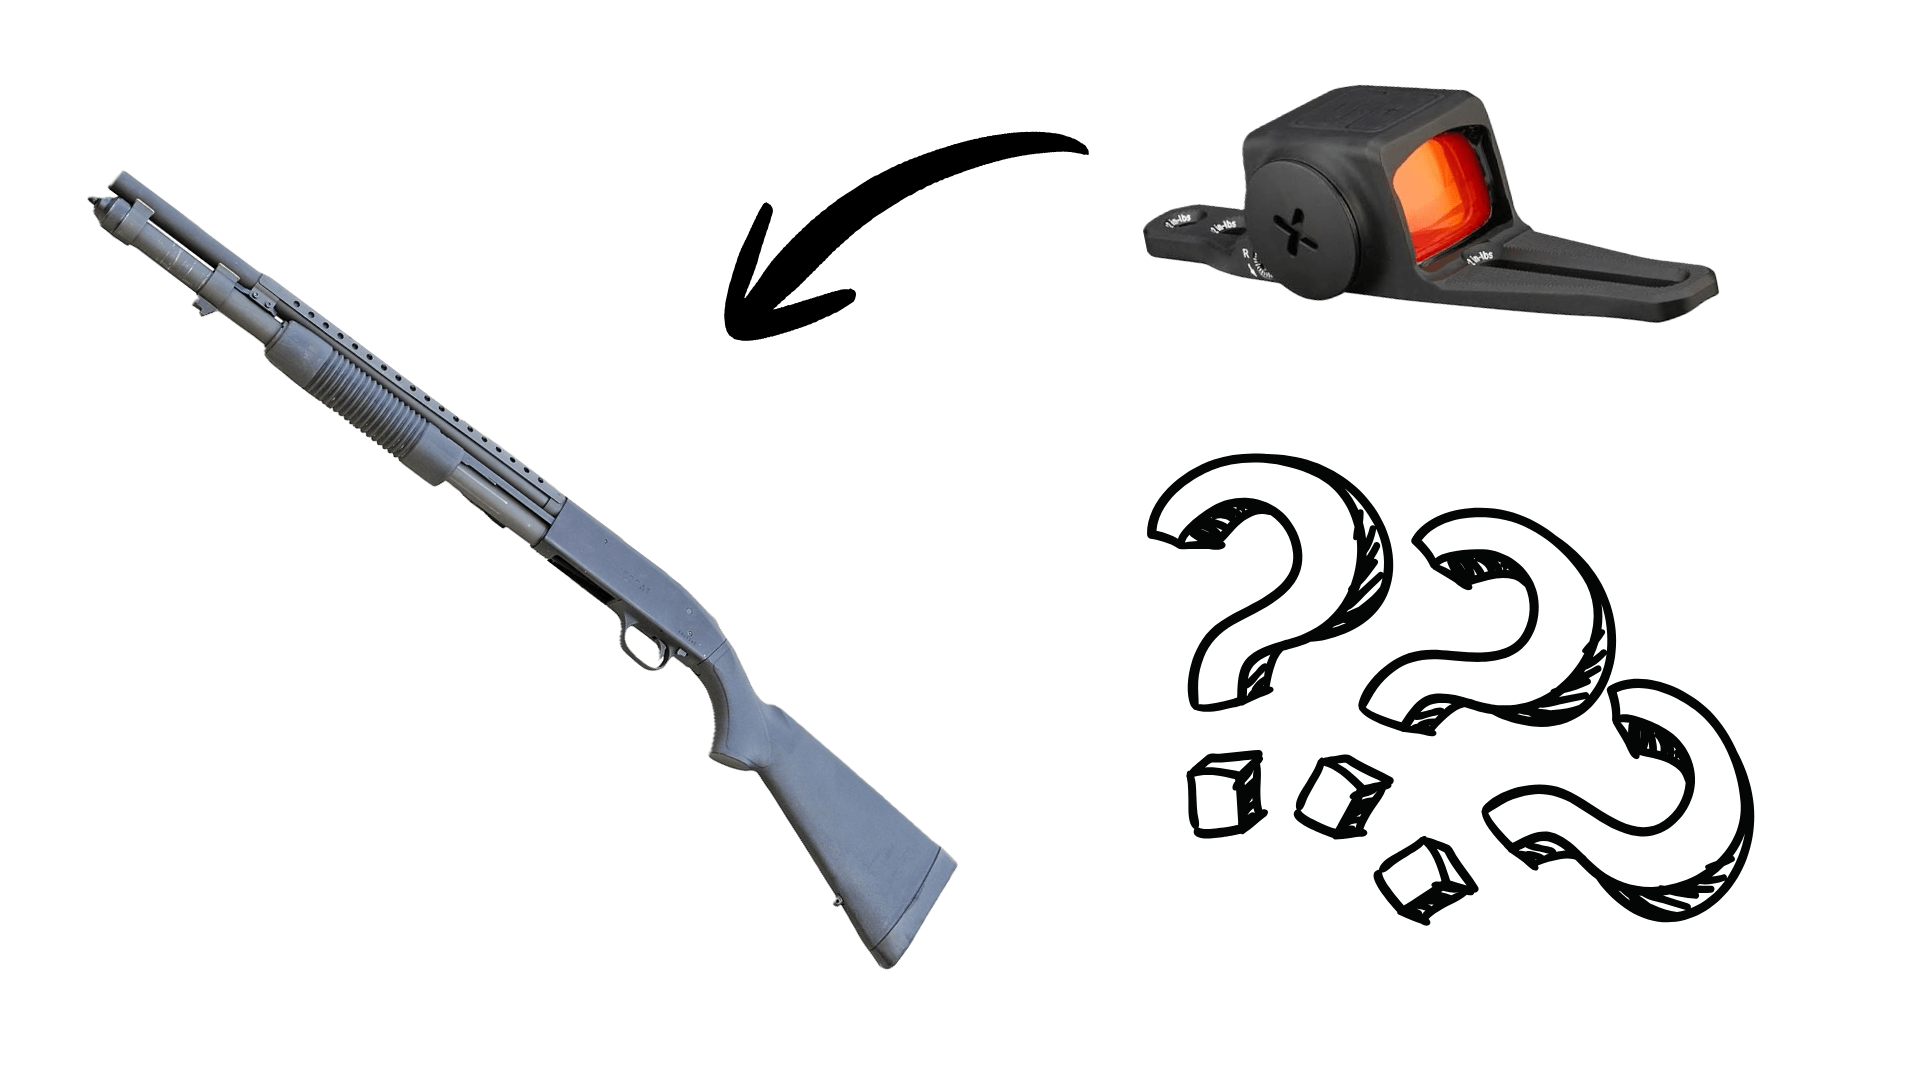
how to mount a red dot sight on a shotgun

Reading time: 6 mins

If you’re wondering how to mount a red dot on a shotgun, here’s the short answer: it depends on what your receiver or barrel already gives you. Most shotguns fall into one of four setups—a factory rail, a vent rib, a plain receiver that takes a saddle mount, or a receiver that needs drilling and tapping.

Shotgun recoil hits harder than what most rifle or pistol optics are built for, so the right mount isn’t just about looks. It’s about picking the method that survives your gun.

This guide walks you through all four, step by step, so you mount your optic once and trust it to hold zero. This is especially important if you’re looking for the best shotgun red dot sight.

Highlights

  • Your mount type depends on what your shotgun already has: rail, vent rib, plain receiver, or nothing.
  • Shotgun recoil is rougher on hardware than rifle or pistol recoil, so torque and threadlocker matter more.
  • Four real mounting methods exist, and only one needs a gunsmith.
  • Mount position affects how fast you find your dot, not just how it looks.
  • A handful of common mistakes are behind many zero-shift complaints, and they’re easy to avoid.

Why Shotguns Aren’t Rifles or Pistols When It Comes to Mounting

Shotgun recoil comes down to simple physics: the heavier your payload and the faster it leaves the barrel, the harder your gun kicks back. That’s why heavy 3.5-inch turkey and waterfowl loads have a reputation for punishing recoil, while a standard 20-gauge stays noticeably milder.

That gap in kick matters here because it’s exactly what works screws loose over time, shot after shot.

Most shotguns also skip the continuous top rail you’d find on a modern AR. Some have one built in, others have a barrel rib instead, and some have neither, so your red dot mount isn’t one-size-fits-all.

The upside: shotgun patterns forgive small aiming errors, so you don’t need rifle-level precision, just a mount that won’t shake loose.

Step 1: Figure Out What Mount Your Shotgun Needs

Before buying anything, look closely at your shotgun’s receiver and barrel.

Factory Rail or Drilled-and-Tapped Receiver

The Beretta A300 Ultima Patrol and most Benelli M4 variants ship with a Picatinny rail on the receiver. The Mossberg 940 Pro instead uses a direct-mount cut, with drilled-and-tapped holes as a backup.

This is your easiest starting point, since the receiver is the gun’s most rigid part.

Vent Rib Barrel

A raised, slotted strip along the barrel is a vent rib, common on field and turkey guns like the Remington 870 Express.

You’ll need a rib-clamp mount here, and since it sits farther from the receiver, mount weight matters more.

Plain Receiver, No Rail or Rib

Some pump shotguns fall into this group, though plenty of current models ship drilled and tapped already, so check yours first.

Where that’s not the case, a saddle mount replaces your trigger group pins with mounting bolts, giving you a rail without touching the barrel.

Nothing Drilled or Tapped

This is where a gunsmith drills and taps the receiver. It’s the most secure long-term option, but it’s not a weekend project.

It also usually costs more than a bolt-on mount, so get a quote first.

Tools You’ll Need

  1. A torque driver or wrench rated in inch-pounds, not foot-pounds
  2. Blue (removable) threadlocker, not red
  3. The correct mount for your optic’s footprint
  4. Isopropyl alcohol or a degreaser and a clean cloth
  5. Your optic, plus its factory screws

First, double-check that your mount matches your optic’s footprint. A “close enough” fit can still leave screw holes misaligned.

How to Mount a Red Dot on a Shotgun

Clear and unload your shotgun first. Then follow the steps for your mount type.

Method 1: Factory rail or drilled receiver

  1. Clean and degrease the rail surface and screw threads.
  2. Set the optic for a clear, fast sight picture.
  3. Hand-tighten the screws, then torque in a crisscross pattern to spec.
  4. Apply threadlocker, then re-check torque after your first function check.

Method 2: Vent rib clamp mount

  1. Loosen all the mount’s screws before fitting it.
  2. Slide the mount over the rib, arrow facing the muzzle, and center it.
  3. Hand-tighten the center screws first, then torque the rest in a crisscross pattern.
  4. Confirm the mount sits flat before installing your optic.

Method 3: Saddle or trigger-pin mount

  1. Remove the factory trigger group pins.
  2. Install the mount using the kit’s replacement bolts.
  3. Check that the trigger group still seats and functions correctly.
  4. Torque to spec, then mount your optic to the new base.

Method 4: Drill and tap

This belongs to a gunsmith. It’s the most permanent option, but getting it wrong yourself can damage a receiver that isn’t cheap to replace.

Where to Position Your Red Dot

Red dots have very long eye relief, long enough that most shooters call it “unlimited,” so placement is more about preference than necessity. Mounting farther forward gives a wider view around the optic but a narrower window through it; mounting closer does the opposite.

Shoulder the gun unloaded in a few spots before final torque-down, and pick your co-witness height if you run iron sights or a bead.

Torque, Threadlocker, and Keeping Your Mount From Backing Out

This is where shotgun-specific care matters most. Small optic screws are almost always torqued in inch-pounds, not foot-pounds, and depending on the hardware, that typically lands between 15 and 30 inch-pounds.

Treat that as a planning range, and always check your mount’s printed spec instead of guessing.

Use blue threadlocker, not red. Blue is removable if you need to service the mount later; red is permanent and can strip on removal.

Because shotgun recoil is harder on hardware, check every screw after your first magazine or two, then again around 50 rounds in.

Don’t overcorrect, either. Cranking screws past spec on a thin aluminum mount strips threads just as easily as leaving them loose.

Quick Notes by Shotgun Model

  • Remington 870: Express and Tactical models differ, so check for a vent rib versus a drilled-and-tapped receiver.
  • Mossberg 500/590: Most receivers ship drilled and tapped already. Saddle mounts stay popular mainly for the shell carrier, not because they’re your only option.
  • Benelli M4 / Beretta A300 Ultima Patrol: Typically ship optics-ready with a factory rail.
  • Break-action turkey guns: Shorter receivers mean fewer options, so check compatibility first.

Mistakes That Ruin Your Zero

  • Skipping degreasing before applying threadlocker
  • Mounting too far forward or back without testing field of view first
  • Using a mount rated for rifle recoil, not shotgun recoil
  • Never re-torquing screws after your first range trip
  • Forcing a mount onto an optic footprint it wasn’t built for

What to Do Next

Once mounted and torqued, don’t head straight to the field. Bore sight indoors first, then confirm your point of impact on paper.

See our guide on how to zero a red dot sight for the full walkthrough.

FAQs

Can you put a red dot on any shotgun?

Almost any shotgun can take one. The method depends on your receiver and barrel.

Do you have to drill your shotgun to add a red dot?

No. Rails, vent-rib clamps, and saddle mounts all work without permanently modifying the receiver.

What height should a red dot sit on a shotgun?

Low enough for a solid cheek weld, high enough to co-witness with your bead or iron sights.

Will shotgun recoil loosen a red dot mount?

It can, without proper torque and threadlocker, which is why checking screws around 50 rounds in matters.

Do you need a gunsmith to mount a shotgun red dot?

Only for drilling and tapping. You can install rail, rib, and saddle mounts yourself.

Conclusion

Mounting a red dot on a shotgun comes down to matching the method to what your gun already gives you: a rail, a rib, a plain receiver, or a blank slate that needs a gunsmith.

Get the tools right, torque to spec, use blue threadlocker, and check your screws early and often, since shotgun recoil is tougher on hardware than most other platforms.

Do that, and your optic is far more likely to hold zero for the long haul.

Looking for a red dot sight? Browse Gold Trigger’s red dot sight collection now! You can also call us at 713-485-5773.

Disclaimer: This guide is for general informational purposes only. If you’re not experienced with firearm maintenance, have a qualified gunsmith do any mounting, drilling, or modifying. Always follow manufacturer instructions and torque specs, and confirm your firearm is unloaded before starting. You’re responsible for complying with applicable laws. Gold Trigger isn’t liable for damage or injury from improper installation.

Comments

Leave a Reply

Your email address will not be published. Required fields are marked *

How to Mount a Red Dot on a Shotgun: Step-by-Step Guide

how to mount a red dot sight on a shotgun

Reading time: 6 mins

If you’re wondering how to mount a red dot on a shotgun, here’s the short answer: it depends on what your receiver or barrel already gives you. Most shotguns fall into one of four setups—a factory rail, a vent rib, a plain receiver that takes a saddle mount, or a receiver that needs drilling and tapping.

Shotgun recoil hits harder than what most rifle or pistol optics are built for, so the right mount isn’t just about looks. It’s about picking the method that survives your gun.

This guide walks you through all four, step by step, so you mount your optic once and trust it to hold zero. This is especially important if you’re looking for the best shotgun red dot sight.

Highlights

  • Your mount type depends on what your shotgun already has: rail, vent rib, plain receiver, or nothing.
  • Shotgun recoil is rougher on hardware than rifle or pistol recoil, so torque and threadlocker matter more.
  • Four real mounting methods exist, and only one needs a gunsmith.
  • Mount position affects how fast you find your dot, not just how it looks.
  • A handful of common mistakes are behind many zero-shift complaints, and they’re easy to avoid.

Why Shotguns Aren’t Rifles or Pistols When It Comes to Mounting

Shotgun recoil comes down to simple physics: the heavier your payload and the faster it leaves the barrel, the harder your gun kicks back. That’s why heavy 3.5-inch turkey and waterfowl loads have a reputation for punishing recoil, while a standard 20-gauge stays noticeably milder.

That gap in kick matters here because it’s exactly what works screws loose over time, shot after shot.

Most shotguns also skip the continuous top rail you’d find on a modern AR. Some have one built in, others have a barrel rib instead, and some have neither, so your red dot mount isn’t one-size-fits-all.

The upside: shotgun patterns forgive small aiming errors, so you don’t need rifle-level precision, just a mount that won’t shake loose.

Step 1: Figure Out What Mount Your Shotgun Needs

Before buying anything, look closely at your shotgun’s receiver and barrel.

Factory Rail or Drilled-and-Tapped Receiver

The Beretta A300 Ultima Patrol and most Benelli M4 variants ship with a Picatinny rail on the receiver. The Mossberg 940 Pro instead uses a direct-mount cut, with drilled-and-tapped holes as a backup.

This is your easiest starting point, since the receiver is the gun’s most rigid part.

Vent Rib Barrel

A raised, slotted strip along the barrel is a vent rib, common on field and turkey guns like the Remington 870 Express.

You’ll need a rib-clamp mount here, and since it sits farther from the receiver, mount weight matters more.

Plain Receiver, No Rail or Rib

Some pump shotguns fall into this group, though plenty of current models ship drilled and tapped already, so check yours first.

Where that’s not the case, a saddle mount replaces your trigger group pins with mounting bolts, giving you a rail without touching the barrel.

Nothing Drilled or Tapped

This is where a gunsmith drills and taps the receiver. It’s the most secure long-term option, but it’s not a weekend project.

It also usually costs more than a bolt-on mount, so get a quote first.

Tools You’ll Need

  1. A torque driver or wrench rated in inch-pounds, not foot-pounds
  2. Blue (removable) threadlocker, not red
  3. The correct mount for your optic’s footprint
  4. Isopropyl alcohol or a degreaser and a clean cloth
  5. Your optic, plus its factory screws

First, double-check that your mount matches your optic’s footprint. A “close enough” fit can still leave screw holes misaligned.

How to Mount a Red Dot on a Shotgun

Clear and unload your shotgun first. Then follow the steps for your mount type.

Method 1: Factory rail or drilled receiver

  1. Clean and degrease the rail surface and screw threads.
  2. Set the optic for a clear, fast sight picture.
  3. Hand-tighten the screws, then torque in a crisscross pattern to spec.
  4. Apply threadlocker, then re-check torque after your first function check.

Method 2: Vent rib clamp mount

  1. Loosen all the mount’s screws before fitting it.
  2. Slide the mount over the rib, arrow facing the muzzle, and center it.
  3. Hand-tighten the center screws first, then torque the rest in a crisscross pattern.
  4. Confirm the mount sits flat before installing your optic.

Method 3: Saddle or trigger-pin mount

  1. Remove the factory trigger group pins.
  2. Install the mount using the kit’s replacement bolts.
  3. Check that the trigger group still seats and functions correctly.
  4. Torque to spec, then mount your optic to the new base.

Method 4: Drill and tap

This belongs to a gunsmith. It’s the most permanent option, but getting it wrong yourself can damage a receiver that isn’t cheap to replace.

Where to Position Your Red Dot

Red dots have very long eye relief, long enough that most shooters call it “unlimited,” so placement is more about preference than necessity. Mounting farther forward gives a wider view around the optic but a narrower window through it; mounting closer does the opposite.

Shoulder the gun unloaded in a few spots before final torque-down, and pick your co-witness height if you run iron sights or a bead.

Torque, Threadlocker, and Keeping Your Mount From Backing Out

This is where shotgun-specific care matters most. Small optic screws are almost always torqued in inch-pounds, not foot-pounds, and depending on the hardware, that typically lands between 15 and 30 inch-pounds.

Treat that as a planning range, and always check your mount’s printed spec instead of guessing.

Use blue threadlocker, not red. Blue is removable if you need to service the mount later; red is permanent and can strip on removal.

Because shotgun recoil is harder on hardware, check every screw after your first magazine or two, then again around 50 rounds in.

Don’t overcorrect, either. Cranking screws past spec on a thin aluminum mount strips threads just as easily as leaving them loose.

Quick Notes by Shotgun Model

  • Remington 870: Express and Tactical models differ, so check for a vent rib versus a drilled-and-tapped receiver.
  • Mossberg 500/590: Most receivers ship drilled and tapped already. Saddle mounts stay popular mainly for the shell carrier, not because they’re your only option.
  • Benelli M4 / Beretta A300 Ultima Patrol: Typically ship optics-ready with a factory rail.
  • Break-action turkey guns: Shorter receivers mean fewer options, so check compatibility first.

Mistakes That Ruin Your Zero

  • Skipping degreasing before applying threadlocker
  • Mounting too far forward or back without testing field of view first
  • Using a mount rated for rifle recoil, not shotgun recoil
  • Never re-torquing screws after your first range trip
  • Forcing a mount onto an optic footprint it wasn’t built for

What to Do Next

Once mounted and torqued, don’t head straight to the field. Bore sight indoors first, then confirm your point of impact on paper.

See our guide on how to zero a red dot sight for the full walkthrough.

FAQs

Can you put a red dot on any shotgun?

Almost any shotgun can take one. The method depends on your receiver and barrel.

Do you have to drill your shotgun to add a red dot?

No. Rails, vent-rib clamps, and saddle mounts all work without permanently modifying the receiver.

What height should a red dot sit on a shotgun?

Low enough for a solid cheek weld, high enough to co-witness with your bead or iron sights.

Will shotgun recoil loosen a red dot mount?

It can, without proper torque and threadlocker, which is why checking screws around 50 rounds in matters.

Do you need a gunsmith to mount a shotgun red dot?

Only for drilling and tapping. You can install rail, rib, and saddle mounts yourself.

Conclusion

Mounting a red dot on a shotgun comes down to matching the method to what your gun already gives you: a rail, a rib, a plain receiver, or a blank slate that needs a gunsmith.

Get the tools right, torque to spec, use blue threadlocker, and check your screws early and often, since shotgun recoil is tougher on hardware than most other platforms.

Do that, and your optic is far more likely to hold zero for the long haul.

Looking for a red dot sight? Browse Gold Trigger’s red dot sight collection now! You can also call us at 713-485-5773.

Disclaimer: This guide is for general informational purposes only. If you’re not experienced with firearm maintenance, have a qualified gunsmith do any mounting, drilling, or modifying. Always follow manufacturer instructions and torque specs, and confirm your firearm is unloaded before starting. You’re responsible for complying with applicable laws. Gold Trigger isn’t liable for damage or injury from improper installation.

Leave a Reply

Your email address will not be published. Required fields are marked *

Shopping cart0
There are no products in the cart!